

How To Set The Timing On A Chevy 350
Dropping a distributor into the engine is a time-honored procedure that has been around since the first engines coughed their way to life more than 100 years agone.
With the latest generation of distributor-less engines, this tribal knowledge has slipped from its "must-know" status. Merely if y'all are working on an older engine with a distributor, this is essential data.
The process is easy and it will have longer to read nearly than to actually perform the chore, so let'due south get started.
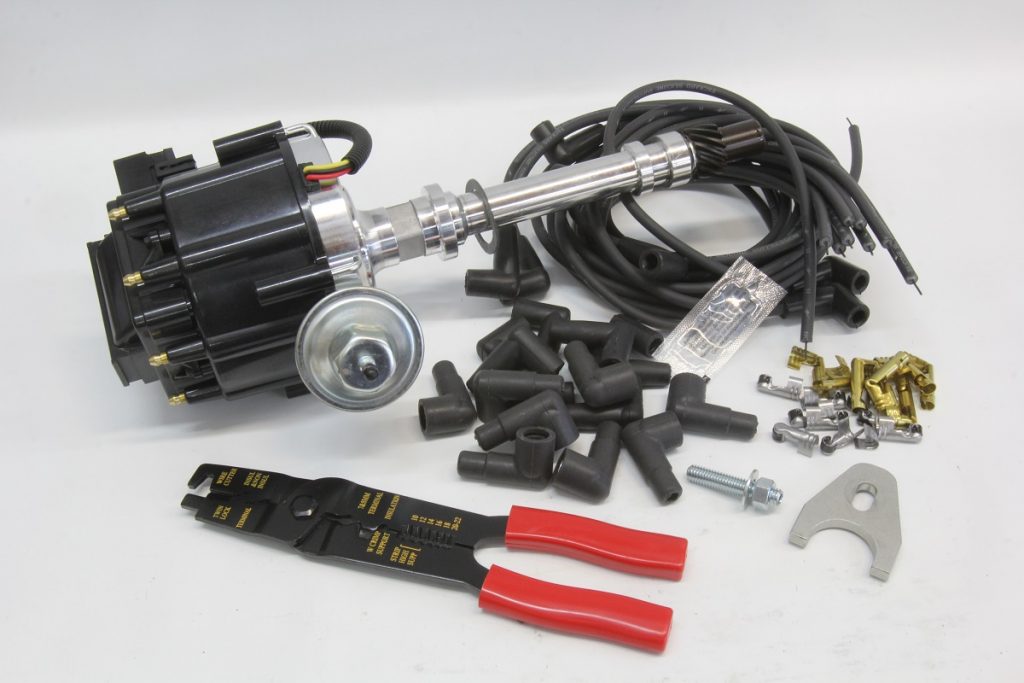
For this procedure, we will use a small-cake Chevy considering that was the closest engine for the photos. However, the process we'll describe is exactly the same for any 4-stroke engine.
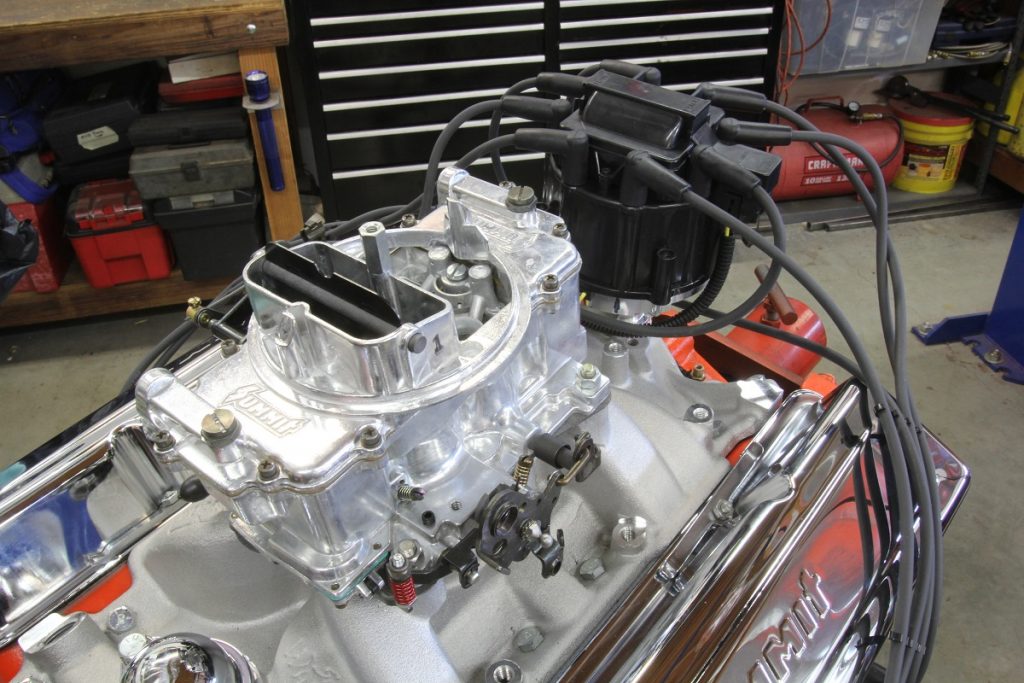
Our detail engine is a make new Chevrolet Goodwrench crate engine on which nosotros've already installed a new intake manifold.
In our example, the spark plugs were all removed, which makes turning the engine over very easy. If the engine is in the car, yous can use the starter motor to crank the engine.
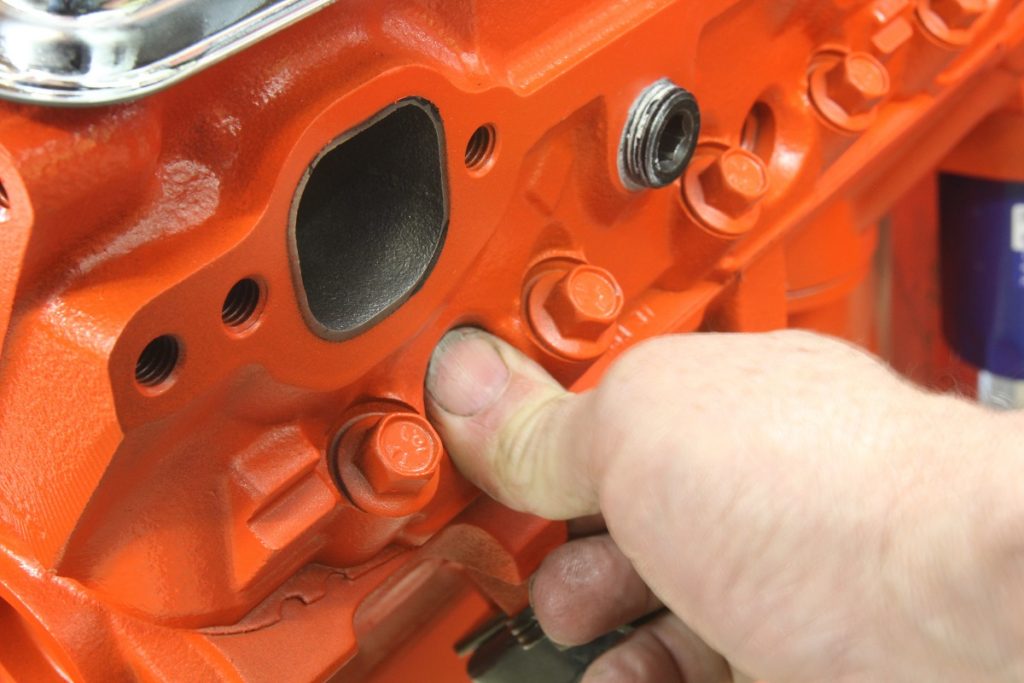
With the Number One spark plug removed, place your thumb over the hole while turning the engine. Once you lot feel compression building, look for the nothing mark on the harmonic balancer to approach the timing tag. We prefer to set the initial timing for most engines at 10 degrees Before Pinnacle Dead Centre (BTDC).
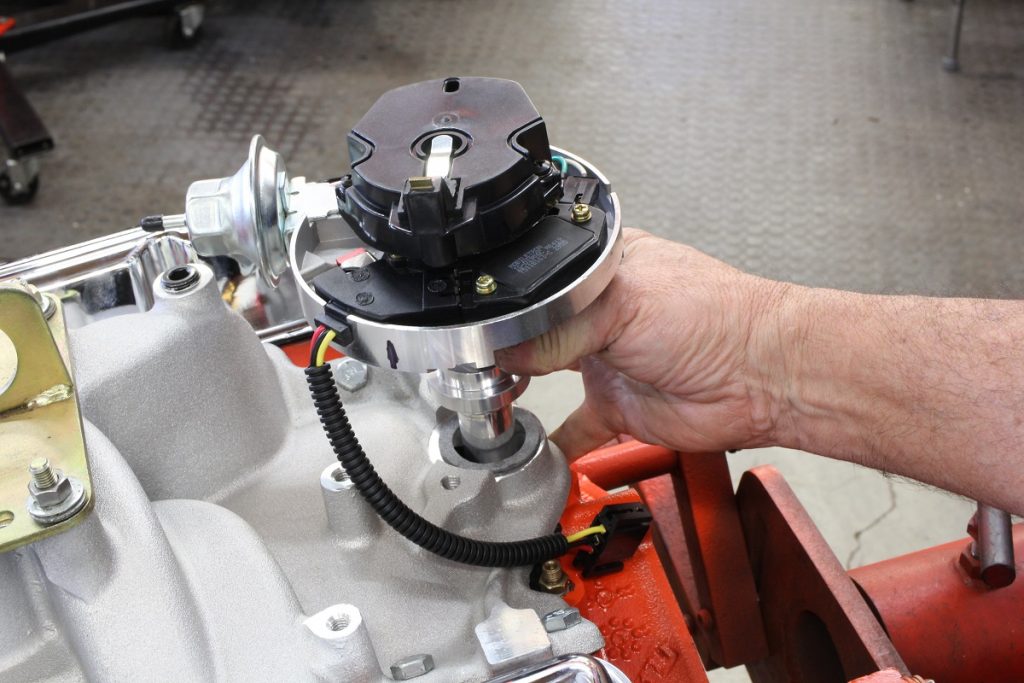
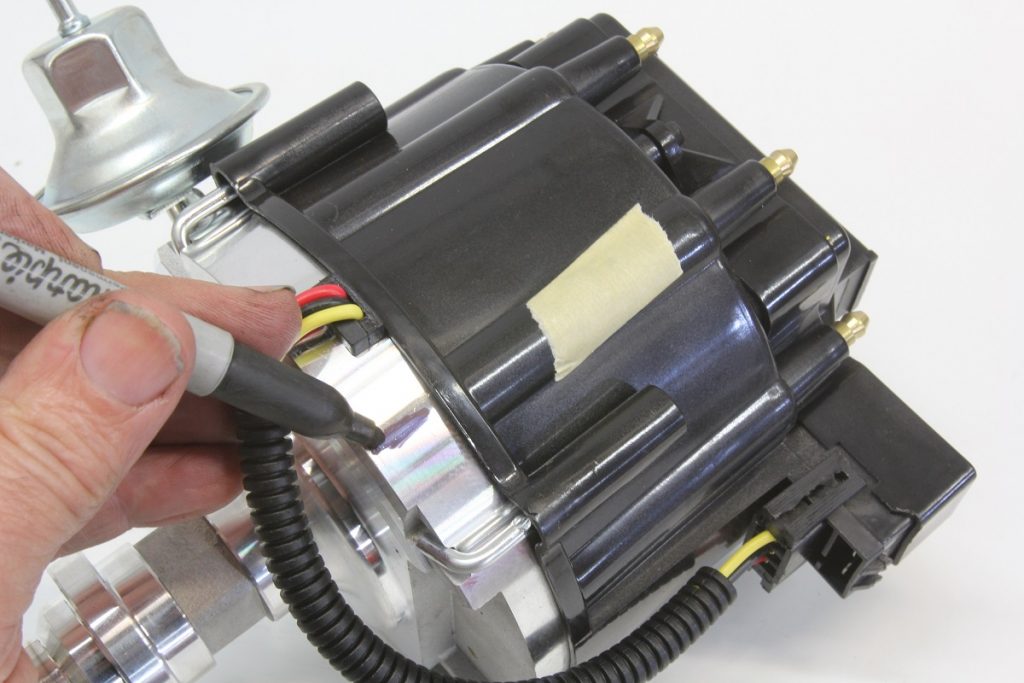
With that set, remove the cap from the distributor. We're using a Tiptop HEI distributor. We use a black Sharpie to place a mark on the benefactor body where we want the Number One spark plug wire to be located. This can be placed anywhere you like, but if yous are a Chevrolet traditionalist, this ends up roughly at about the 5 o'clock position on the distributor equally you are looking at it from the front of the engine.
Also place a mark on the corresponding Number One plug wire position on the distributor cap. We used a slice of masking tape.
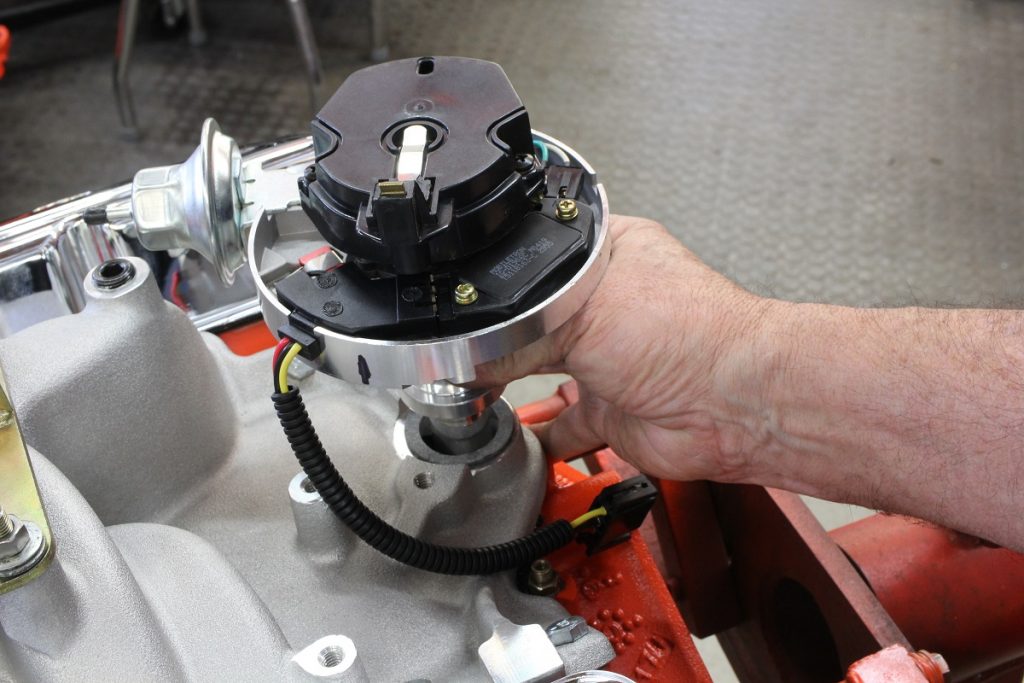
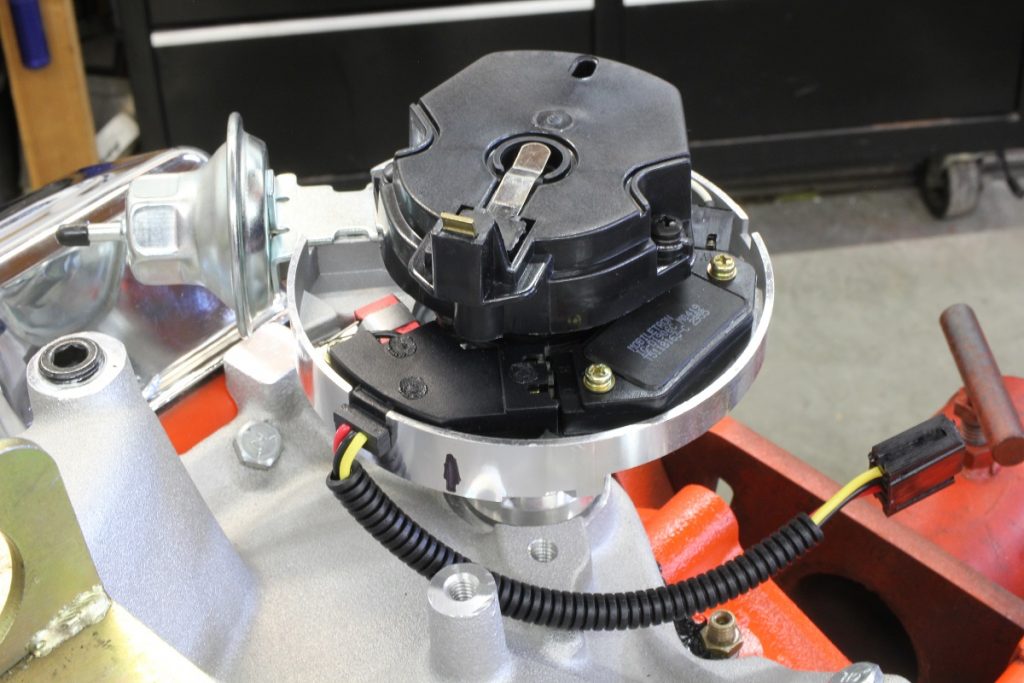
With these marks in place, drop the distributor with the gasket into the distributor pigsty with the rotor pointing near the Number 1 marking.
As the distributor drive gear engages the teeth on the camshaft, this volition motion the rotor slightly clockwise. Position the distributor then that the vacuum advance canister is located on the rider side of the engine pointing roughly forwards. If the rotor is not pointed close to the Number Ane mark, pull the benefactor and re-position the rotor until it comes close.
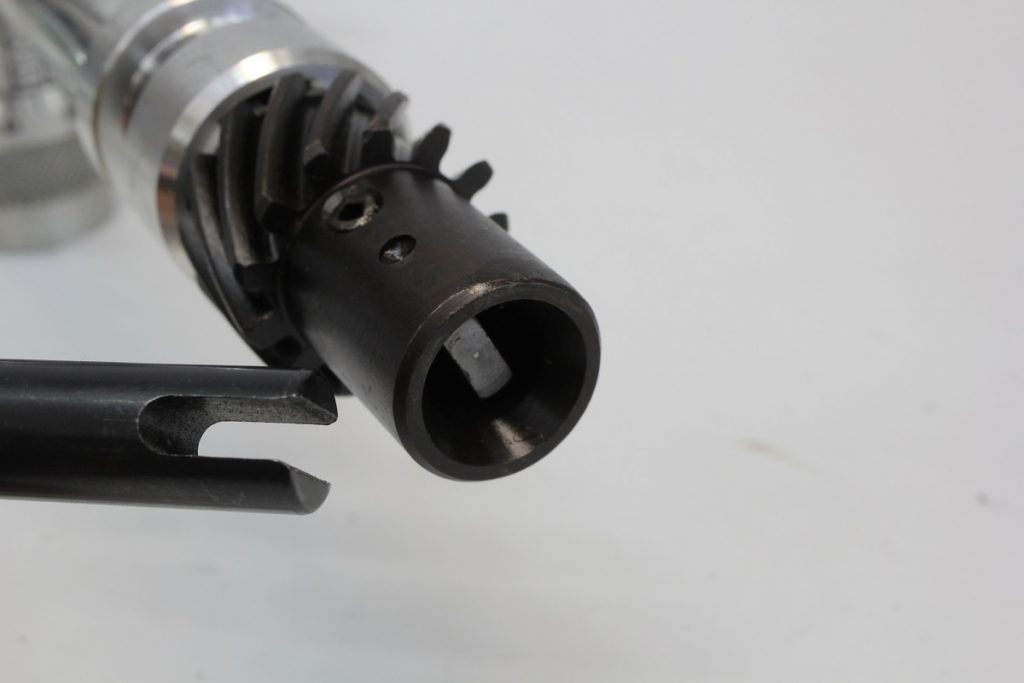
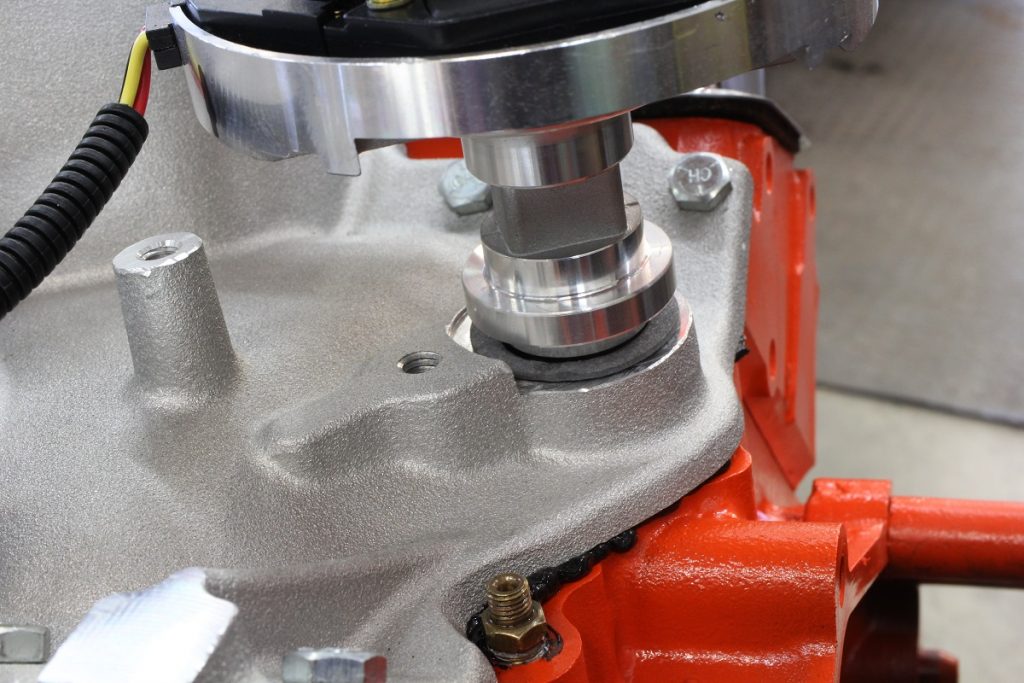
Unless you are very lucky, the distributor will not drop fully into the intake manifold. In almost all cases, the distributor will sit about 3/8 inch off of the manifold. This is normal and is caused by the oil pump drive not engaged into the drive tang in the distributor. Yous tin remove the benefactor and effort to re-orient the oil pump drive slot with a long straight screwdriver, just this is somewhat difficult.
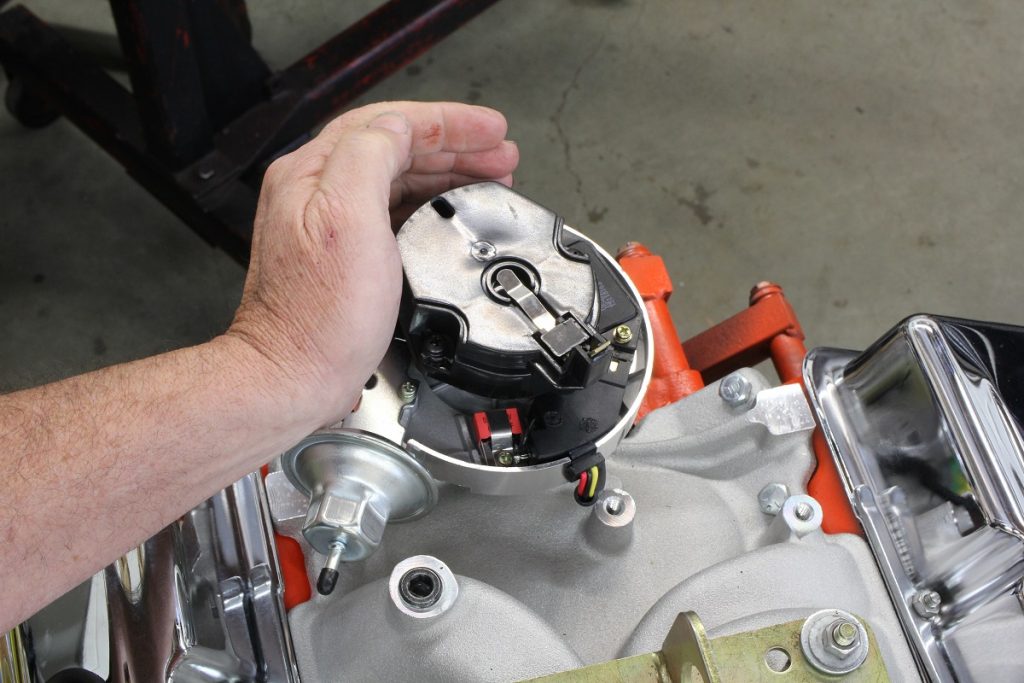
It's easier to go out the distributor in place and then bump the engine with the starter motor while placing very light down force per unit area on the distributor body. After a half rotation or so, the distributor will drop in place. Now we will need to crank the engine until again it is located at ten degrees BTDC. With this accomplished, cheque to ensure the rotor is pointed near the mark on the distributor torso for Number One spark plug wire. If the rotor is not pointing at Number One, yous could twist the distributor trunk, merely if it is off past more than one molar, this will require turning the distributor body too far. Instead, you will demand to remove the distributor and repeat the previous procedure as the rotor is non in the right position.
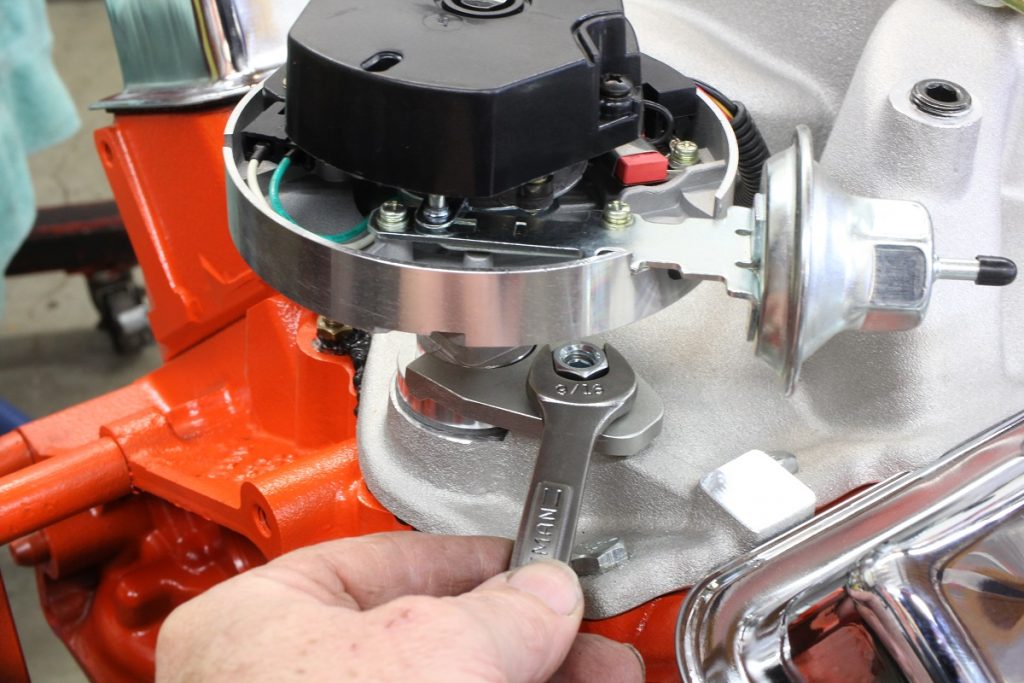
With the rotor close to the Number One position, twist the distributor body until the rotor points directly at the Number One spark plug terminal position marking on the distributor. At present install the benefactor cap and sure-fire the distributor body down to the intake manifold with the hold-downwards clench. Tighten this lightly—we may have to motility it again when the engine starts.
With the benefactor in place, install all of the spark plugs. Now we can connect the spark plug wires to the benefactor.
Let'southward presume that y'all've never done this earlier. Earlier nosotros can place the wires in the benefactor cap, the first affair we need to know is which management the rotor turns.
For our Chevrolet engine you'll notation that the rotor turns clockwise. Small- and big-block Fords plough counter-clockwise.
…
Tech Tip: One quick mode to tell on whatever vacuum accelerate style benefactor is to lay your hand parallel with the vacuum advance canister so curl your fingers inward toward the middle of the benefactor body. The direction your fingers point is the direction of rotor movement. On a Chevy distributor, you lot would use your left hand, and on a Ford you'll apply your correct hand. This is a cool fiddling fox you lot tin can use on any distributor to make up one's mind its rotation.
…
On modest- and big-cake Chevy engines, the Number One cylinder is e'er the driver's side front.
Chevrolet also numbers its cylinders with odd numbers on the left (driver) side and fifty-fifty cylinders on the right.
The left side is numbered one-3-5-seven, and the right side is 2-4-6-8.
Ford does information technology differently. Ford numbers its cylinders with Number One on the right forepart, numbered on the correct side i-two-iii-iv with the left side 5-6-seven-8. Other manufacturers number their cylinders differently, then you should bank check online if you're non certain.
Run across OnAllCylinders' firing lodge cheat sheet for installing the plug wires in the right order.
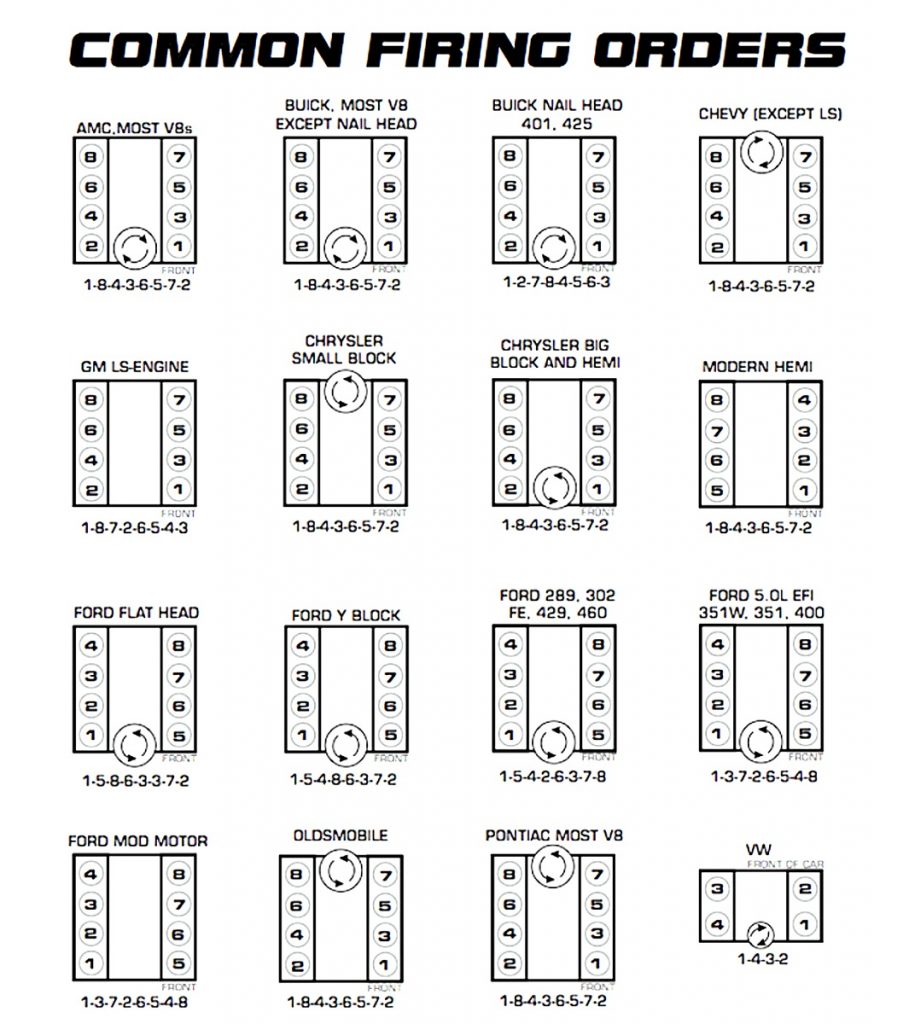
Our modest-block Chevy firing club is 1-8-4-iii-6-5-seven-2, then that'due south the order in which we will install the plug wires.
Nosotros started with Number One and worked our mode around the distributor cap clockwise using a set up of Pinnacle spark plug wires. The all-time way to do this so you lot don't get dislocated is to only follow the firing order installing each plug wire through the social club.
Leave a little extra room with the spark plug wires to allow freedom of motion in the benefactor. For Chevys, be careful to brand sure five and 7 are installed correctly. If the wires are accidentally switched, the engine will not be happy.
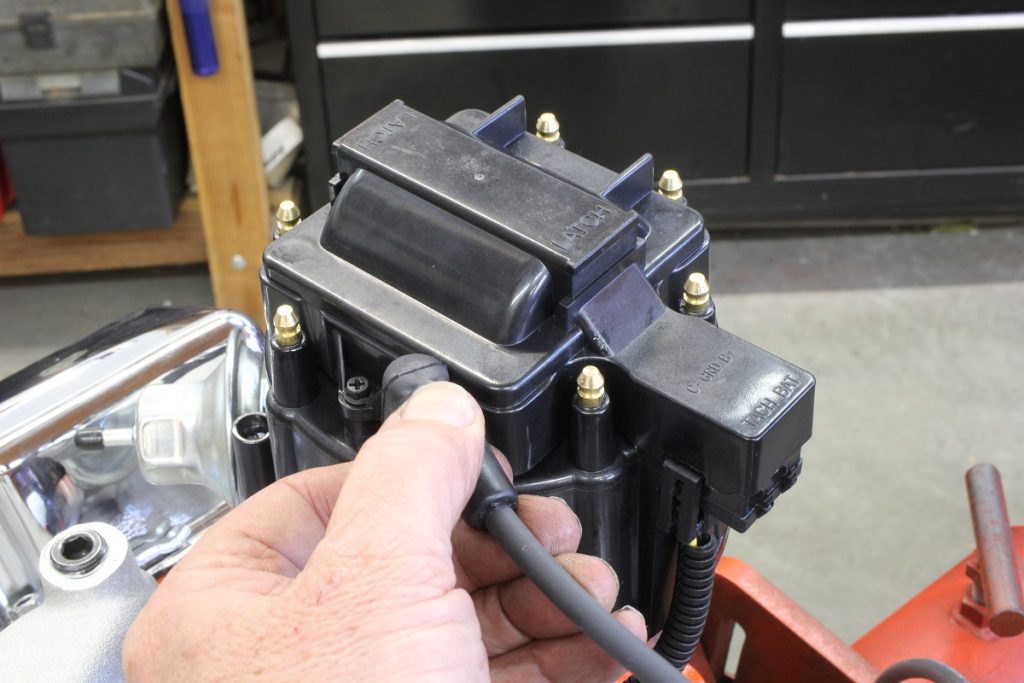
Before we attempt to start the engine, exist sure the distributor is continued to switched power. With an HEI distributor, at that place is a 3-wire inboard connector betwixt the HEI module and the cap.
On the outboard side of this connector, there are two smaller individual connectors—one for ability from the ignition switch (marked BATT) and the other for a tach. With those connections in identify and the distributor, plugs, and wires connected, we're almost ready to kickoff the engine.
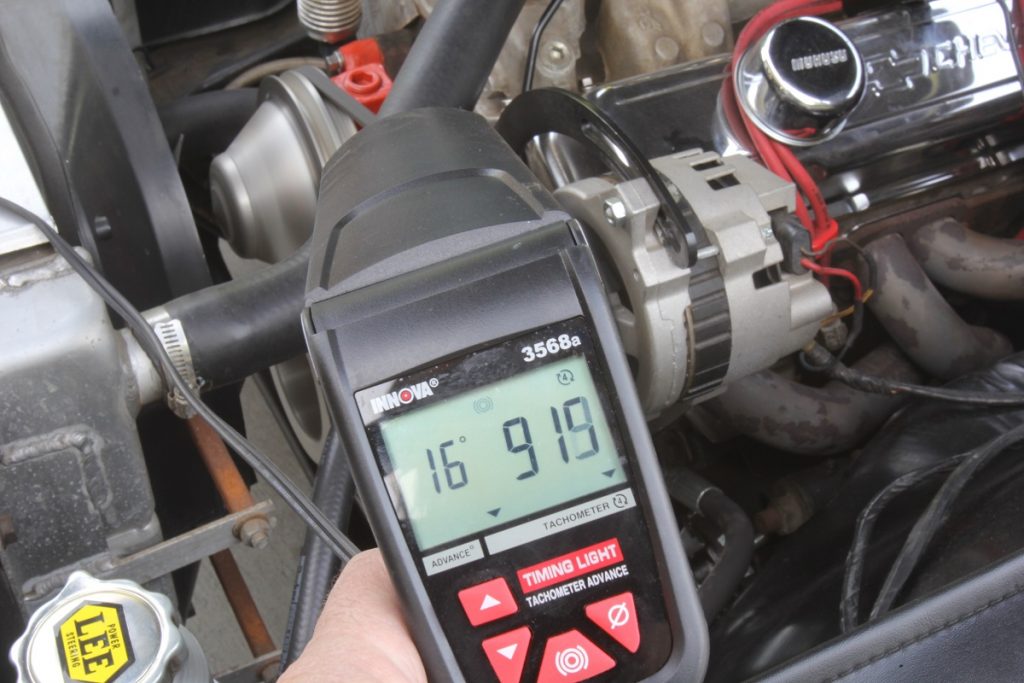
Connect a timing light to the Number I cylinder. Now nosotros're gear up to fire the engine. Assuming the engine starts, make certain the engine is idling at proper idle speed and not on the fast-idle cam of the choke.
It'south important that the engine be idling at its warm-idle rpm. Information technology's likely that our static ignition timing at the crankshaft at idle may not be the desired 10 degrees BTDC.
If information technology must be inverse, merely loosen the hold-down nut and adjust the distributor until the initial timing on the crankshaft is at the desired timing figure. Of course, you lot are free at this point to gear up the initial timing at its proper spec.
We volition relieve the give-and-take almost initial, mechanical, and vacuum accelerate for a subsequent story, simply you now accept the distributor gear up in place and the plug wires installed correctly and it'due south entirely possible that the engine will run much improve at present with a properly timed ignition.

Source: https://www.onallcylinders.com/2020/04/16/how-to-install-a-distributor-and-set-initial-timing/
0 Response to "How To Set The Timing On A Chevy 350"
Post a Comment